Start a QC Session for a Streaming Discovery Job
Enterprise Streaming Discovery Jobs combine a Discovery Job and either a Streaming Discovery Data Extract Job or Processing (Streaming Imaging) Job. These jobs can be opened in QC for review and reprocessing of data if there are errors.
This topic explains how to start a QC session for a Streaming Discovery Job. You can also start a QC session for a Standard Data Extract Job and a Standard Processing Job. For more information, see Start a QC Session for a Standard Data Extract Job and Start a QC Session for a Standard Processing Job.

|
This function is also explained in educational content on the IPRO Learning Center. Click the following link to be redirected to the course: discovery ][ Enterprise: Imaging Job Quality Control |
Streaming Discovery Jobs that contain at least one discovered document may be opened. Documents that completed Discovery as well as documents that were not exported are available for QC.
The QC menu options and user interface are slightly different for Enterprise Streaming Discovery Jobs. The following screen shot shows the QC interface, and the table that follows describes the items labeled in the image.

|
Item |
Description |
||
|---|---|---|---|
|
A |
Metadata tab (displays the metadata fields and their values for the selected document) |
||
|
B |
Extracted text/OCR tab (displays the extracted text/OCR for the selected document) |
||
|
C |
Metadata columns (located above the list in the Documents window – can be sorted). Documents for an Enterprise Streaming Discovery Job can contain a BEGDOC Last Exported metadata field as the first metadata column. The field displays the BEGDOC of the file in its Export Job. All Export Job types, including Enterprise Streaming Discovery Exports, include this field. Similar to Enterprise Imaging, the field shows the BEGDOC of the file that was processed. This column may be searched and sorted.
|
||
|
D |
Field value search icon |
||
|
E |
Document context menus (additional functions are available when right clicking a document in the Documents window) |
||
|
F |
Reprocess option icons (located in the QC Function toolbar at the bottom of the Documents window |
||
|
G |
Flags pane (Flags, Languages, and Encoding tabs) |
||
|
H |
View tab (the Image and Thumbnail tabs are not applicable for Enterprise Streaming Discovery QC Jobs) |
||
|
I |
Documents window |
For more information about performing QC on documents in the Document window, see QC Individual Items in the Documents Window and Introduction to eCapture QC.
Create a QC Session for a Streaming Discovery Data Extract Job
-
In the eCapture QC main window, on the File menu, select Create Session for Enterprise Streaming Discovery Jobs(s). The Select Streaming Discovery Job dialog box displays with the Clients Tree View collapsed.
-
Under Job Type, choose Discovery.

- Expand the Clients Tree View and select the Job.
-
Click OK. The Start QC Session dialog box appears.
-
Set the appropriate options and click OK to initiate the QC session.
-
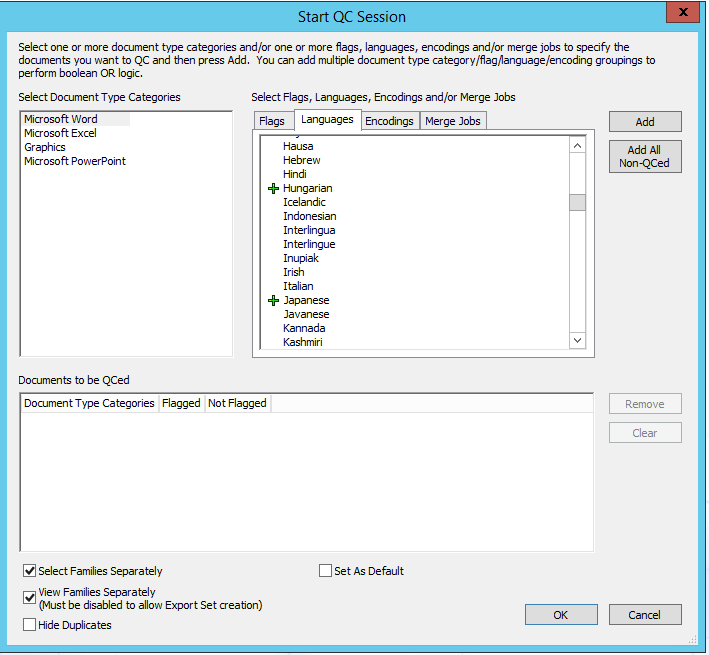
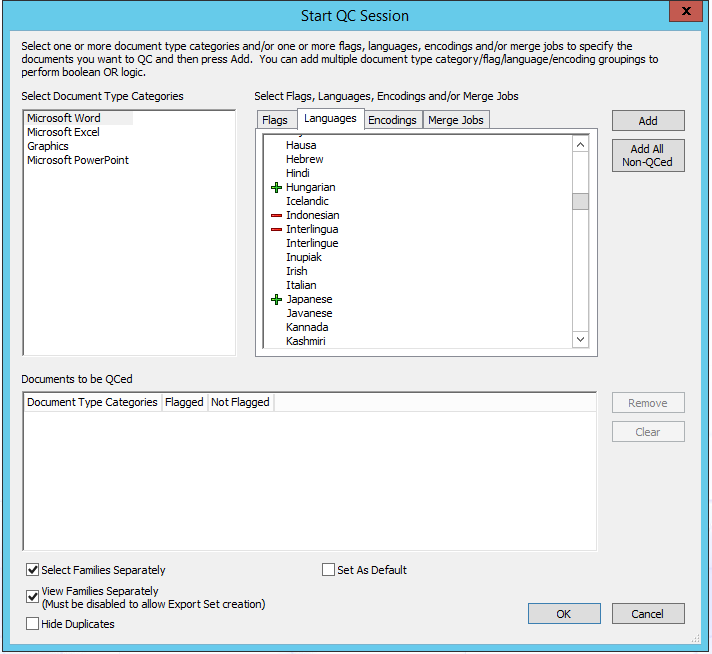
Select one or more categories in the Select Document Type Categories list box.
-
Click the Flags tab.
-
Select one or more flags by clicking the flag once (a green plus sign appears). The designated category selected is shown only if it does have the flag.
-
Click the flag twice (a red minus sign appears). The designated category selected is shown only if it does not have the flag.


Note: To clear a selected flag, click the flag with the green plus sign twice or click the flag with the red minus sign once.
-
-
Click the Languages tab.
-
Select one or more languages by clicking the language once (a green plus sign appears). The designated category selected is shown only if it does have the language.
-
Click the language twice (a red minus sign appears). The designated category selected is shown only if it does not have the language.
Note: To clear a selected language, click the language with the green plus sign twice or click the language with the red minus sign once.
-
-
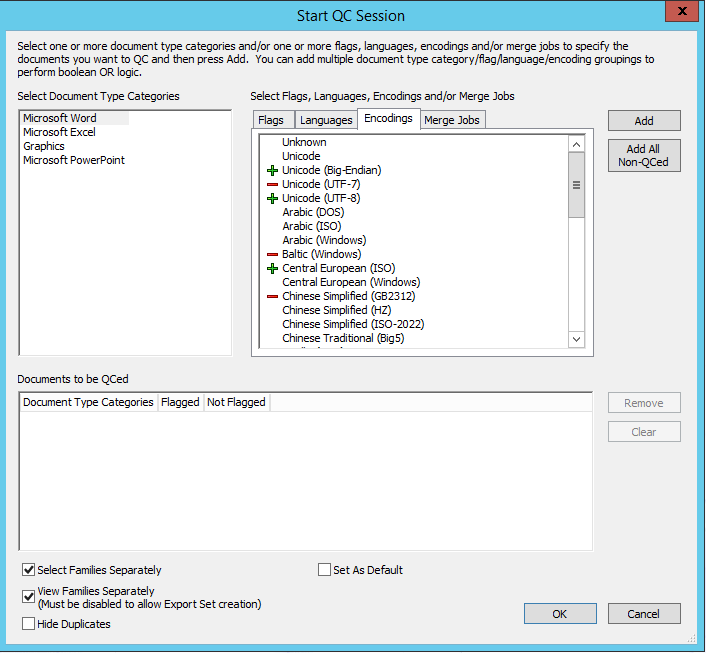
Click the Encodings tab.
- Select one or more encodings by clicking the encoding once (a green plus sign appears). The designated category selected is shown only if it does have the encoding.
-
Click the encoding twice (a red minus appears). The designated category selected is shown only if it does not have the encoding.
Note: To clear a selected encoding, click the encoding with the green plus sign twice or click the encoding with the red minus sign once.
-
Click the Merge Jobs tab.
- Select one or more Merge Jobs by clicking the merge job once (a green plus sign appears). The designated category selected is shown only if it does have the merge job.
- Click the merge job twice (a red minus sign appears). The designated category selected is shown only if it does not have the merge job.
Note: To clear a selected merge job, click the merge job with the green plus sign twice or click the merge job with the red minus sign once.
When one or more merge jobs are selected, it/they appear(s) in the drop-down list of the View toolbar.
-
-
After the categories and/or flag(s) are selected as flagged and/or not flagged, click Add to add the session. The session displays in the Documents to be QCed list. There are three columns in the list: Document Type Categories, Flagged, and Not Flagged.
For example, if you want to see all Microsoft Word documents that passed QC, you would select Microsoft Word in the Select Document Type Categories list box and click Passed QC once in the Flags tab. A green plus sign appears.
-
Click
 to add those categories to the
list whose documents are not flagged as passing QC. The Passed QC
flag then displays in the Not Flagged column.
to add those categories to the
list whose documents are not flagged as passing QC. The Passed QC
flag then displays in the Not Flagged column. -
(Optional) Repeat these steps as many times as required to add additional, multiple category/flag groupings. Each grouping then displays as its own line in the Documents to be QCed list. Boolean OR logic is applied for two or more groupings.
-
If you want to remove a specific grouping, select it and click Remove. If you want to clear all groupings, click Clear.
-
After you are finished creating one or more groupings for a session, click OK. The eCapture QC main window displays and shows the newly created session tab in the Documents window.


Create a QC Session for a Streaming Discovery Imaging Job
-
In the eCapture QC main window, on the File menu, select Create Session for Enterprise Streaming Discovery Jobs(s). The Select Streaming Discovery Job dialog box displays with the Clients Tree View collapsed.
-
Under Job Type, choose Imaging.

- Expand the Clients Tree View and select the Job.
-
Click OK. The Start QC Session dialog box appears.
-
Set the appropriate options and click OK to initiate the QC session.
-
Select one or more categories in the Select Document Type Categories list box.
-
Click the Flags tab.
-
Select one or more flags by clicking the flag once (a green plus sign appears). The designated category selected is shown only if it does have the flag.
-
Click the flag twice (a red minus sign appears). The designated category selected is shown only if it does not have the flag.
Note: To clear a selected flag, click the flag with the green plus sign twice or click the flag with the red minus sign once.
-
-
Click the Languages tab.
-
Select one or more languages by clicking the language once (a green plus sign appears). The designated category selected is shown only if it does have the language.
-
Click the language twice (a red minus sign appears). The designated category selected is shown only if it does not have the language.
Note: To clear a selected language, click the language with the green plus sign twice or click the language with the red minus sign once.
-
-
Click the Encodings tab.
- Select one or more encodings by clicking the encoding once (a green plus sign appears). The designated category selected is shown only if it does have the encoding.
-
Click the encoding twice (a red minus appears). The designated category selected is shown only if it does not have the encoding.
Note: To clear a selected encoding, click the encoding with the green plus sign twice or click the encoding with the red minus sign once.
-
Click the Merge Jobs tab.
- Select one or more Merge Jobs by clicking the merge job once (a green plus sign appears). The designated category selected is shown only if it does have the merge job.
- Click the merge job twice (a red minus sign appears). The designated category selected is shown only if it does not have the merge job.
Note: To clear a selected merge job, click the merge job with the green plus sign twice or click the merge job with the red minus sign once.
When one or more merge jobs are selected, it/they appear(s) in the drop-down list of the View toolbar.
-
-
After the categories and/or flag(s) are selected as flagged and/or not flagged, click Add to add the session. The session displays in the Documents to be QCed list. There are three columns in the list: Document Type Categories, Flagged, and Not Flagged.
For example, if you want to see all Microsoft Word documents that passed QC, you would select Microsoft Word in the Select Document Type Categories list box and click Passed QC once in the Flags tab. A green plus sign appears.
-
Click
to add those categories to the
list whose documents are not flagged as passing QC. The Passed QC
flag then displays in the Not Flagged column. -
(Optional) Repeat these steps as many times as required to add additional, multiple category/flag groupings. Each grouping then displays as its own line in the Documents to be QCed list. Boolean OR logic is applied for two or more groupings.
-
If you want to remove a specific grouping, select it and click Remove. If you want to clear all groupings, click Clear.
-
After you are finished creating one or more groupings for a session, click OK. The eCapture QC main window displays and shows the newly created session tab in the Documents window.


Related Topics
Start a QC Session for a Standard Data Extract Job